How To Add Related Posts to Squarespace Blog
This post may contain affiliate links. Which means if you make a purchase through them, I may receive a small commission at no extra cost to you!
How and Why You Need to Add Related Posts to Your Blogs
Be sure to grab your copy of the Ultimate Organic Traffic Blueprint right here!
When you’re writing blog posts with SEO in mind, sometimes you may wonder “how can I add just a little bit more to this post?” You want to squeeze as many SEO opportunities out of each post as you can, without making your post sound redundant or just adding random keywords everywhere that don’t really make any sense.
So in this post, I want to walk you through one of my favorite ways to boost SEO for my blog posts: Adding links to related posts.
Sounds so simple right? It is!
There are a couple of ways to do this with Squarespace. One way relies on you categorizing your post blog posts. This is the easiest way to pull in related posts without having to do a lot of manual linking. But if you haven’t done that up to now, you’ll have to go back and do that before you can use this method.
The other way is with manual linking. Which is exactly as it sounds, where you add a link to another blog post to some text in your current post.
I’ll go over both of these methods with you today. Let’s go!
SQUARESPACE SUMMARY BLOCK
This is the simplest way to add a group of related posts if you have been tagging or categorizing your posts up to now.
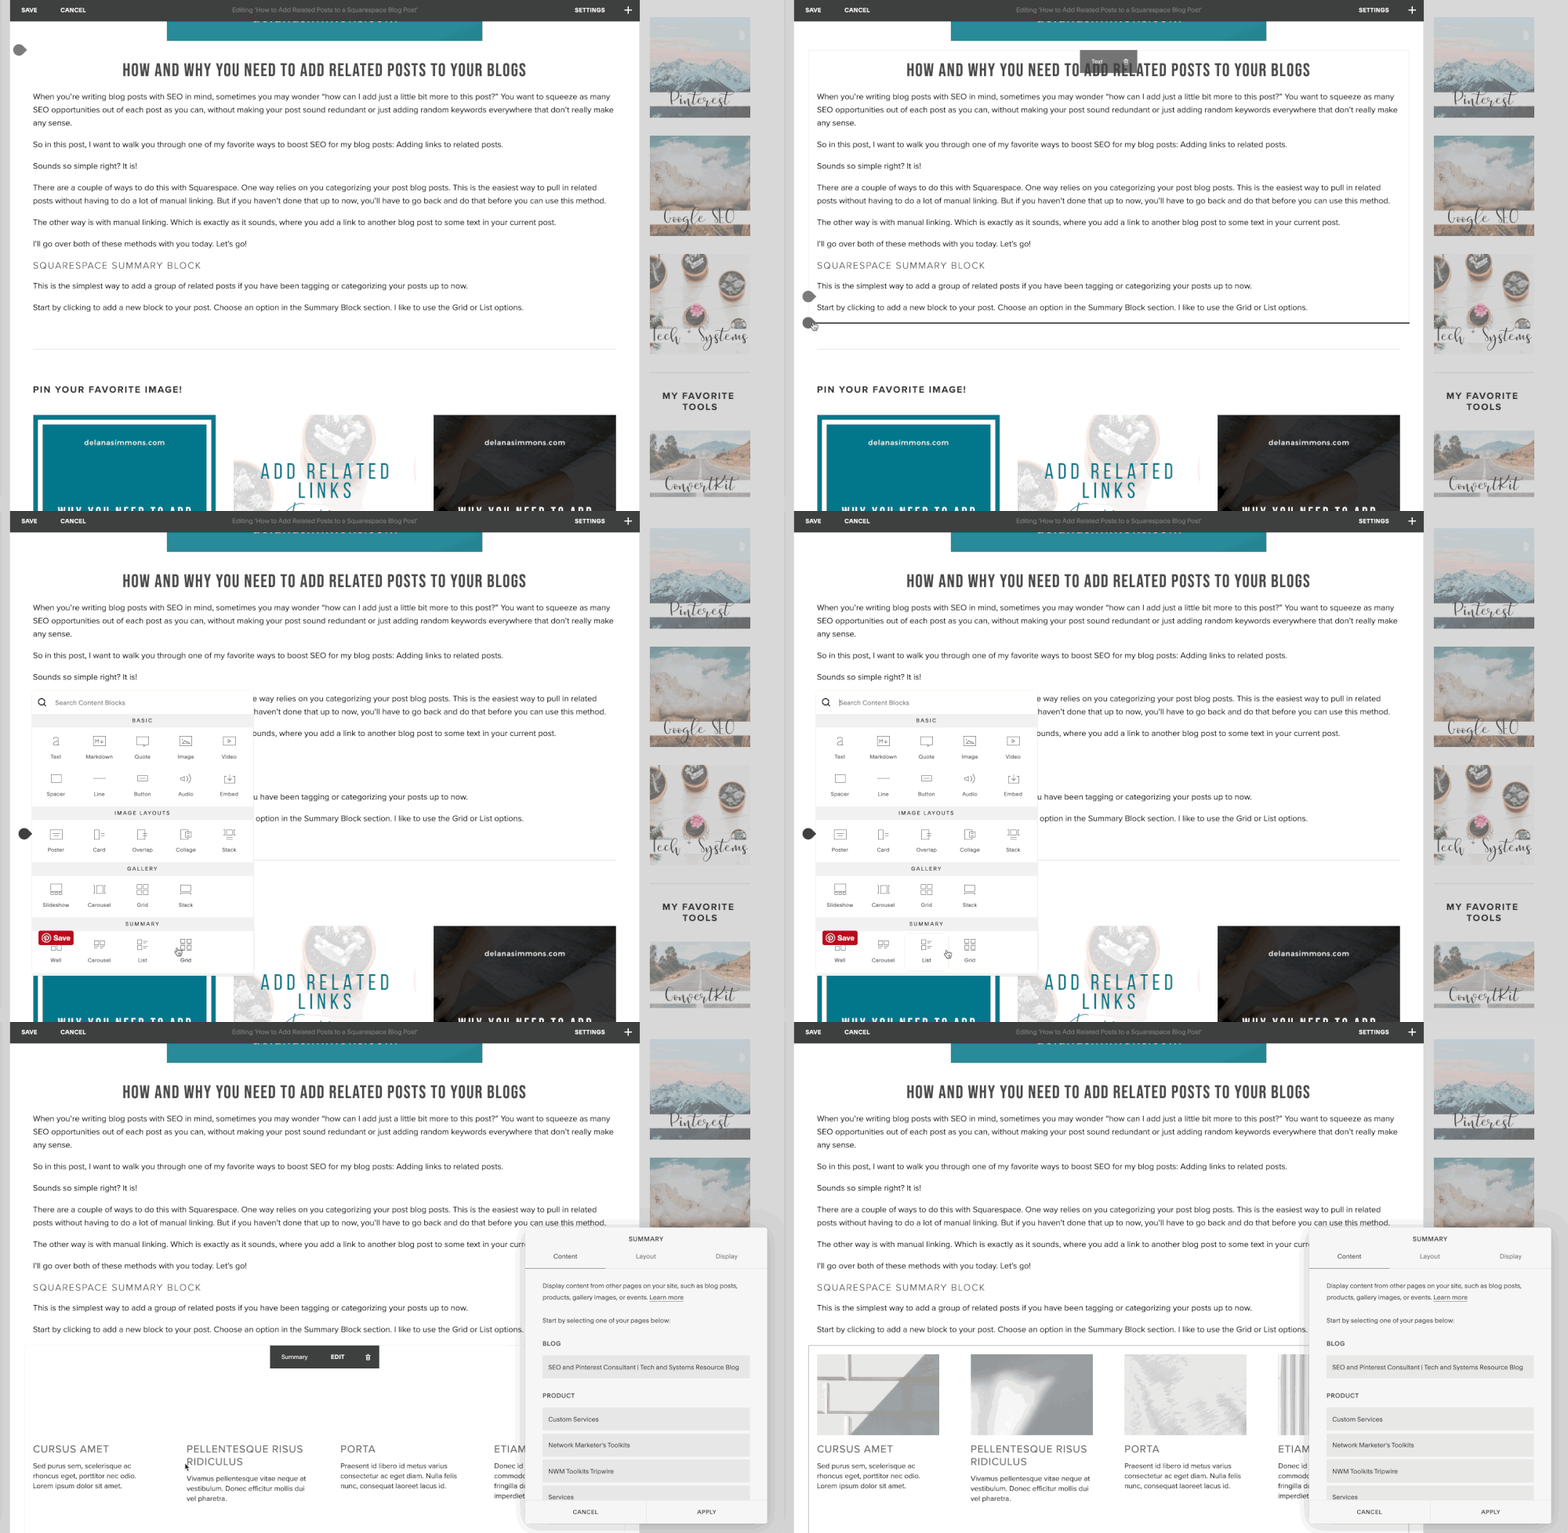
Start by clicking to add a new block to your post. Choose an option in the Summary Block section. I like to use the Grid or List options.
In the next step, you’re going to choose which page you want to feature in the summary block. Choose your blog page. It should be the first option that shows up in the Content tab of the Summary block settings.
Now is where we decide exactly what goes into the summary. These settings may vary a little depending on exactly what you want to show in the blog post.
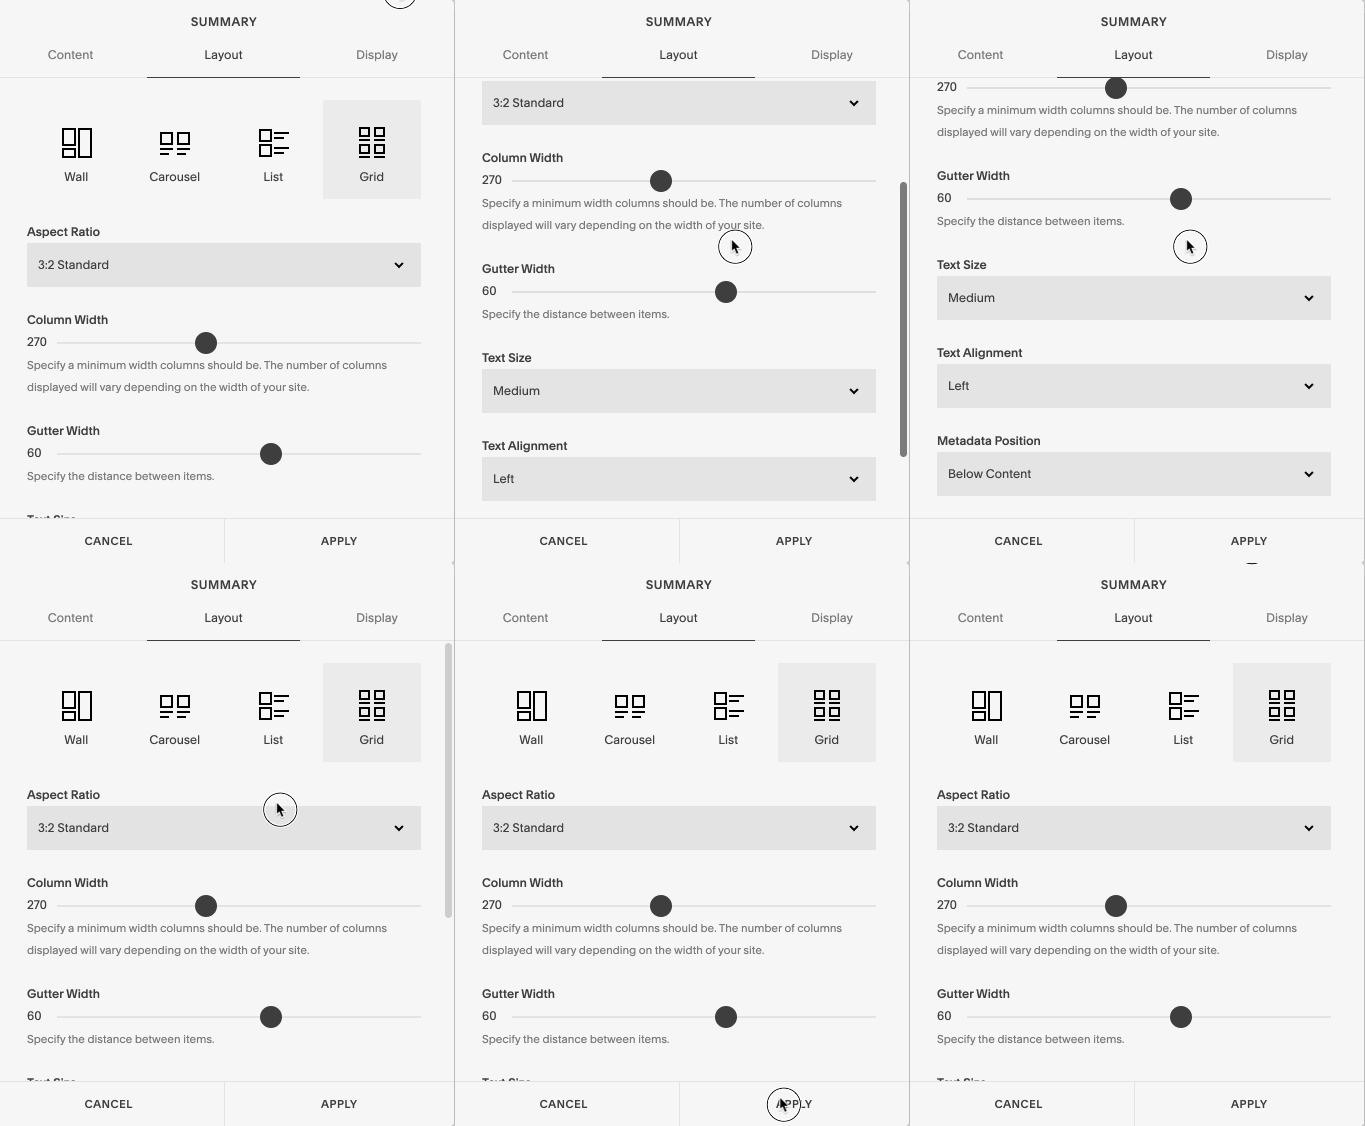
In the Layout tab, you can choose what size image you want to show for each post. And you can adjust the width between images and columns. These are the Gutter and Column options you see there. This is also where you choose the text size, alignment, and metadata position. How you choose to set these up depends entirely on how you want the block to look in your blog post. So play around with the options to see what you like best.
The last settings section is Display. This is where you can choose how many items show in your block, whether you want to show the Title, Thumbnail, Excerpt, or a Read More link. You can also choose if you want any Primary or Secondary metadata to show.
Underneath the Secondary Metadata, you’ll see Category Filter, Tag Filter, and Featured filter. This is where you can choose to only show the posts related to the current one you’re working with.
For example, I write primarily about SEO and Pinterest, with some Tech and Systems posts thrown in. So I tag my posts as such: SEO, Pinterest, or Tech and Systems. So if I was writing a post about Pinterest, related posts would also be about Pinterest. So in this section of the block settings, I would choose to show posts with the Category of Pinterest.
That way, instead of showing only my latest posts, it will show the latest posts related to Pinterest without me having to look up all of those links to add them myself! How cool, right?
Here’s an example of my related posts block for Tech and Systems posts! There’s also a summary block at the bottom of my blog posts that shows my latest posts.
RELATED POSTS:
MANUALLY ADD RELATED LINKS
If the Summary Block doesn’t give you the look you’re going for or if you don’t have your past blog posts tagged or categorized, you can use manual links. In fact, this is still recommended to use throughout your post if you have related content you want to share with your readers.
To set this up, I add a text block in between two spacers. This lets me make the link section smaller than the width of the whole post so it stands out a little better. It looks like this:
RELATED POSTS:
HOW TO ADD A POP UP FORM TO SQUARESPACE
SEND SQUARESPACE FORM TO A THANK YOU PAGE
HOW TO ADD CUSTOM FONTS TO SQUARESPACE
This is simply typing out the text title for the blog post and linking to it directly. Simple. The most difficult part to this method is looking up your old blog post links!
WHY SHOULD I ADD RELATED POST LINKS TO MY BLOGS
Simply put, Google likes it. Google wants to see that your content is relevant and current. So by linking to other blog posts, you let Google know, “hey, I wrote this awesome blog post, but this one is awesome too and related to this.”
It helps Google to boost your Google ranking when searching because it sends people to other places on your website than just the blog post they landed on.
It also adds keywords to your post by adding the titles of those other blog posts. It won’t boost your ranking for those keywords immediately, but the more consistently you use them, the more Google starts to realize that’s what you write about. That’s what you’re an expert on. So when people are searching for those words, your content will start to rank higher and higher.
xx,
Delana
Read the Latest
Hi, I’m Delana!
I'm a Business Systems + Operations Consultant for female entrepreneurs who are struggling to create defined, sustainable systems and processes in their business. I help them create the systems they need so they can confidently hire team members and get back to their clients… and their life!


